


I really love this bag! It was fun to make. It was kind of like birthing a baby. Now that the "birthing" process is over, you forget how painful it was! And you have this gorgeous bundle to show off.


I think I am one of the last to jump on the Amy Butler Weekender Bag band wagon. I've had this pattern for 3 years, the fabric for two years. I even had the pieces cut out! I was so intimidated by the pattern after reading all of the tutorials online and the horror stories that this project just sat in the corner of my studio, calling out "make me" every few months. I meant to make it for our trip to Jekyll Island 2 years ago. Then, I really wanted to take it to Orange Beach last summer. Well, I'm glad to say, that it will be ready for our trip to Orange Beach this summer! I got up my courage, read and reread all of the tips and jumped right in.
I've read a lot of posts where people complain about the cost of this bag and how long it took them to cut out all of the pieces. Well you can look at it this way, if you wait 3 years to make your bag, it will already be paid for and it's nice to start on a project where you can't remember what a pain it was to cut out all the pieces!
I was an art major and have always been a visual learner. I took a lot of photos of this process, ones that I have not seen on other sites. I wanted to document the good and the bad. I've never made a BIG bag like this monster before, so I really wasn't sure what some of the steps involved. I had to read and reread the directions.
I am using my very old Bernina 1130 that I got way back in 1983. I love it and it runs like a charm. It can even sew through 12 layers of fabric. Let's see what it can do.
I really like stitching my own cording. The directions tell you not to stitch too close to the cord, leaving room to restitch closer when the panels are added. I saw where some people used store bought cording or used Stitch Witchery. This cording since it will be attached around corners, etc. is purposely cut on the bias (which stretches). When I stitched mine onto the front of the panels, I pulled it a little to make it stretch while I was sewing. That will make a nice tight fit. Sometimes, if you don't stretch, it will buckle a little. I like the look of handmade cording but the next bag I make (I must have a death wish!) I will use a smaller diameter cording. In Step 11, I didn't have room to stitch the 1/2" seam around the panels..........

I like to use pins........lots of pins. Here I am sewing the cording on the large front pocket. I know it looks like overkill, but I've made enough pockets where I didn't pin all around, then the fabric slipped leaving the pocket uneven.

There were so many horrifying stories of people sewing through their fingers, pin stabs, and punctures that I thought I was doing pretty well, until a pin poked me leaving my DNA on the fabric. That's when I take a break and chill. Start again the next day.
I didn't make too many changes on this bag. One change I made on the straps was to do a double topstitching instead of single.

Here is the front panel with pocket in place and straps being stitched. Looking pretty good. So far no broken needles, only 1 pin stick. I did use jeans needles and made sure I had a brand new sharp needle at the beginning of the project.

This Walking Foot really helped when stitching through multiple layers. I thought I would be able to use it more, but really I used the Zipper foot most of the time because you have to stitch so dang close to the cording. When stitching straight lines (without cording) the Walking Foot saves you a lot of screaming and ripping because it hugs those lower layers and keeps them all lined up neatly.

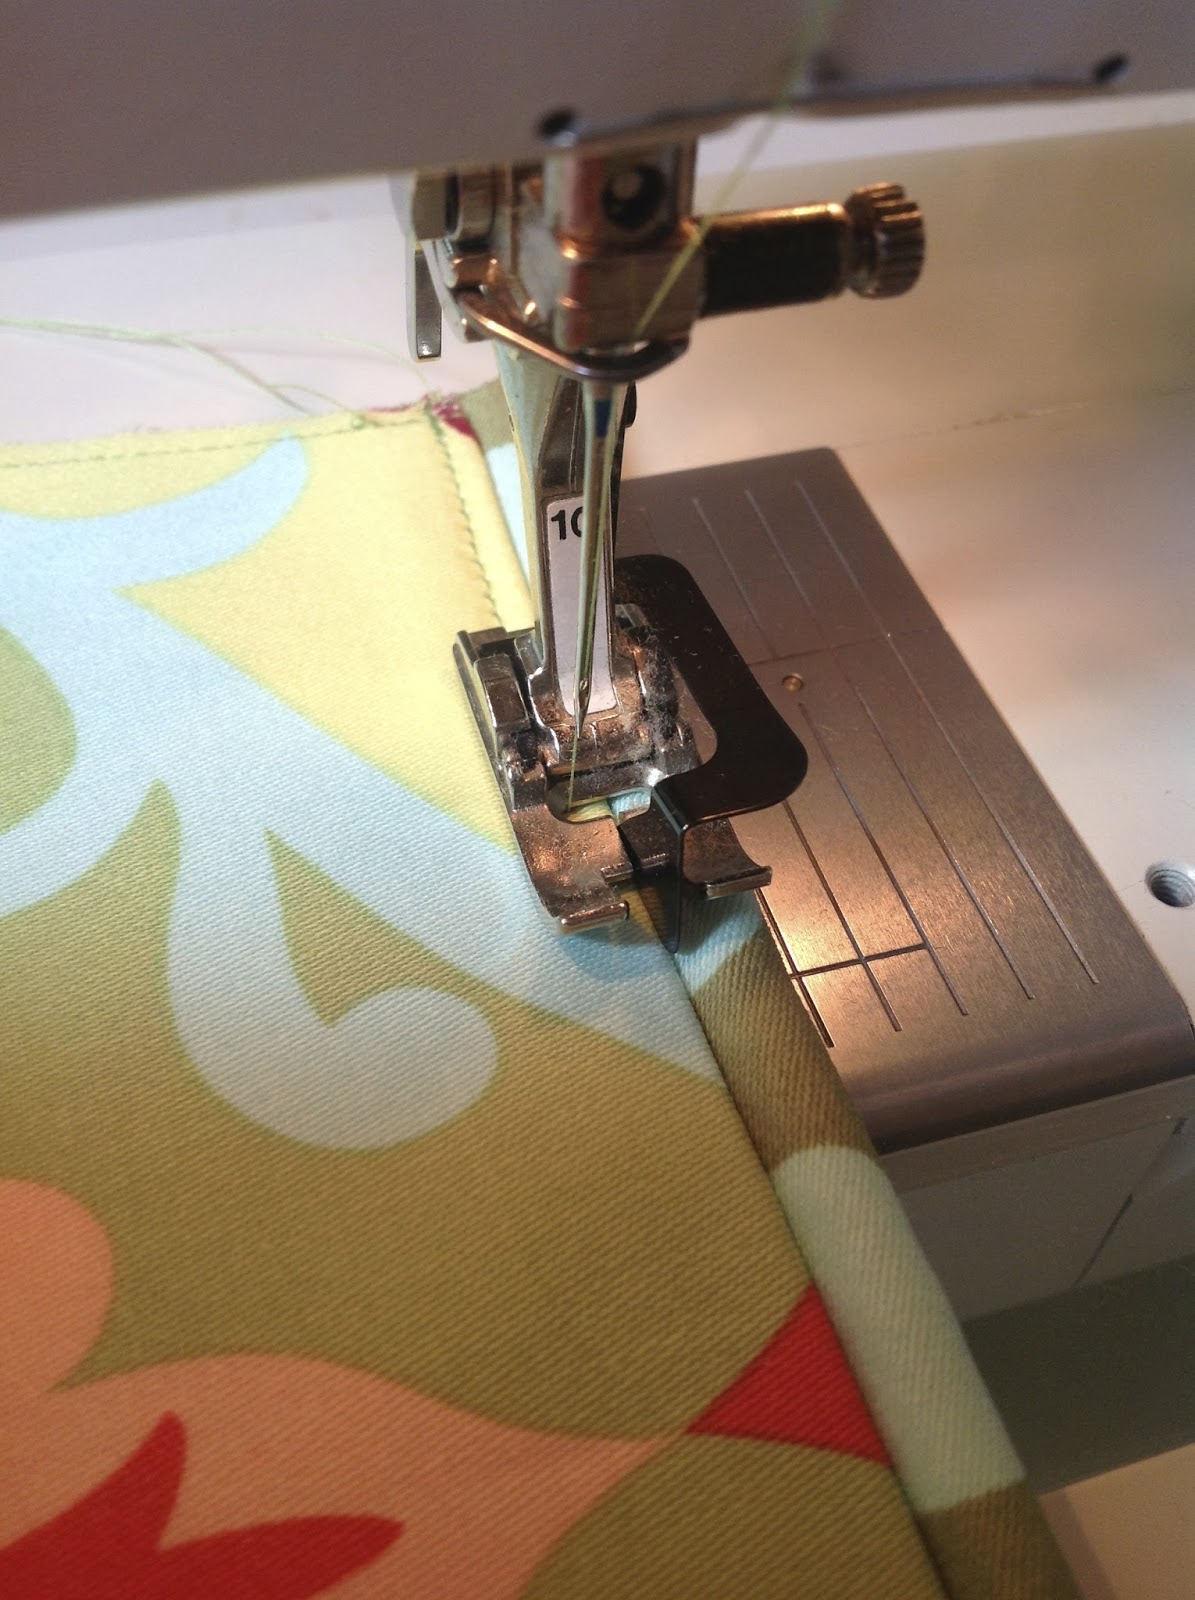
Here I am stitching the cording all around the front panel using the Zipper foot. I found it easier to use short sturdy pins. None of these pins bent. I started out using the longer pins with the yellow tips, and they all bent. I stitched close to the cording but not as close as I could have knowing that I still have to stitch another line next to it when adding the center panel.

OK, this is the front panel completed.

The directions call for 3 layers of fusible interfacing added to the center panels. By the time I ironed all the interfacing in place, it looked like craft foam! I couldn't imagine how I was going to press the seams open. This is where you add the zipper. I've never inserted a zipper in this manner before where you stitch a seam, add the zipper, flip upside down and stitch around the zipper, then use the seam ripper to open the seam above the zipper.

Here is the seam, pressed open, zipper pinned in place.

Next you flip the whole piece upside down, remember the zipper and pins are on the BOTTOM! I marked my 1/4" seam and started stitching.

Then you just use a seam ripper and open the seam...........leaving a perfectly sewn zipper. Honestly, this was one of my biggest fears...............sewing a zipper in this bag. But the directions were perfect and the zipper came out looking outstanding. Patting myself on the back.

This is my Edgestitch Foot which helps to stitch a perfect topstitch below the cording on the pocket. I just move my needle position to the left or right. I am making the smaller side pockets here which are attached to the bottom of the center panel. I did add cording to the top of these pockets which wasn't called for in the pattern'
This is what the center panel looks like stitched to the bottom panel. There are pockets sewn at the bottom of the side panels. You can see the interfacing is not stitched on one side of the bottom panel so you can slip the Peltex bottom in later.

One side panel stitched to the center panel and another one pinned in place. The smaller pins stayed in place better for me instead of the clips that other people used.

This is the dreaded Step 11 where I'm trying to stitch the bottom panel to the center panel and it seems like I have to stitch through about 32 layers! Everything was going OK up until now. I thought, wow, this isn't so bad. What are other people talking about? I can do this. But, wowzers, this was really frustrating because the Peltex was so hard to bend and get everything under the needle in the right position. It kept popping out. You just have to go with it. I only screamed one expletive! But no broken needles!

OK, I haven't seen too many mistakes shown in other posts, but I wanted to show you what can happen. The layers are so darn thick and you are pressing so hard to just feel the cording underneath that I didn't get all of the layers stitched in the seam. That was the end of that night. I was so frustrated that I went to bed, thinking that I would need to rip out the whole panel and start over. But....

I tried sewing another seam all the way around the panel, pushing as close as I could to the cording. It worked! So, if at first you don't succeed, try stitching around and around again until you get it as close to the cording as you can. I'm satisfied!

You can see the edge of the Peltex under the fusible interfacing. The Peltex is so stiff and thick that it is hard to get the zipper foot close enough to the cording. You can see how I have stitched two times, closer each time to the cording . I think the next time I make this bag I will use a smaller cording which will give me more room to sew even closer to the piping. As it is, my zipper foot kept slipping off.

And finally I get to start on the lining. I've never made a bag like this before and wasn't familiar with how to sew in a lining. It took me a long time to figure it out, after reading over and over the directions.
Here, I am tacking the lining to the underneath panels and then slipstitching the lining close to the zipper.

Here it is, finally finished. I can't wait to use it next weekend!

5 comments:
Be assured you are not the last person on the Weekender bandwagon. I just ordered my pattern today. Thanks for all the really great pictures! I'm looking forward to working on my version.
Thanks for all of the lovely pictures. I am going to order this pattern this week and see what I can do with it. Can you tell me what type of fabric you used for this bag?
Charlene, I used Trumpet Flower from Amy Butler's LOVE collection of Home Decor fabrics.
I also made a second Weekender, you can see it here.
http://kathiflyart.blogspot.com/2013/08/another-amy-butler-weekender-bag.html
I used regular quilting weight fabric for the second one.
Good luck with yours! They are worth the trouble! I have used mine several times and love it!
Kathi
Hermoso trabajo!!! tome nota de todos los detalles y en breve quiero hacerme uno de estos bellos bolsos lindo trabajo te felicito saludos!.
Your bag is divine! I love how you centered the pretty design on your pocket and it matched so perfectly with the larger piece behind it. Genius! How much fabric did you use? Do I really need 2 yards per exterior and interior?
Post a Comment